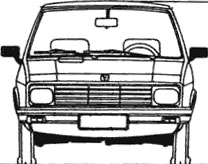
So to start off, I have chosen the vehicle from Suurland.com and found the Blueprints. So we have to create a file hierarchy, get reference material and prep the blueprints for use.
File hierarchy is really easy and just common sense, it stops you losing objects, textures, etc when moving folders between computers. That's what you would probably be doing between home and college/uni, it can be easily forgotten.
For example you may have a file system like this:
Projects > Yugo > Models
> Textures
> Images
> Research
> Renders
> Scenes
Once you have your folders we are going to fill the research folder, most 3D courses ask you to keep your research, but generally its just good practice. Sometimes images on the internet can be taken down, its best to just keep them on your computer.
Google images is usually the best way to find any images you want, just search for the car name, I also searched for Nick and Norah's Infinite Playlist.
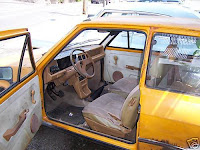
Here are a few images I collected covering most sides of the car and part of the interior and engine.
Last thing for the research folder, we have to prep the blueprints to take them into Lightwave Modeller. It's very simple to do, all we need to do is to take them into a photo editing program, straighten them and crop them. I'm using Photoshop, but most photo editing programs will do.
With these blueprints I found that they needed to be rotated about 1° clockwise. Then you have to crop the separate views so the edges of the vehicle touch the sides of cropped image. Try to make this as exact as possible.

The top down view will need to be rotated to face down for all the images to match up once imported into Lightwave Modeller.
Save all these images in the research folder titled left, back, front and top respectively.
In my next post I'll show you how to import them into Lightwave, line them up properly and start on the wheel arch.


